In this article
- 1. How much space do you need for a garden room golf simulator?
- 2. Planning permission for your garden golf simulator
- 3. Solid foundations: why this is more than just a golf simulator shed
- 4. Wiring your outdoor golf simulator room
- 5. Technology and indoor electrical loop wiring ideas
- 6. Budgeting your build: total golf simulator room cost guide
- Final steps to your dream golf simulator garden room
The short version
- A golf simulator garden room needs a minimum internal height of 2.8m, ideally 3.0m, for safe driver swings.
- Aim for an internal width of at least 3.5m and a depth of 4.5m, or 6.0m of depth for radar-based tracking.
- Within 2m of a boundary, the external height cannot exceed 2.5m; always check with your local planning authority.
- Plan sockets, ceiling projector drop-points and a hardwired Cat6 cable before the internal wall panels go in.
- Golf simulator rooms in our Garden Rooms range provide a practical entry point; Signature is the premium option.
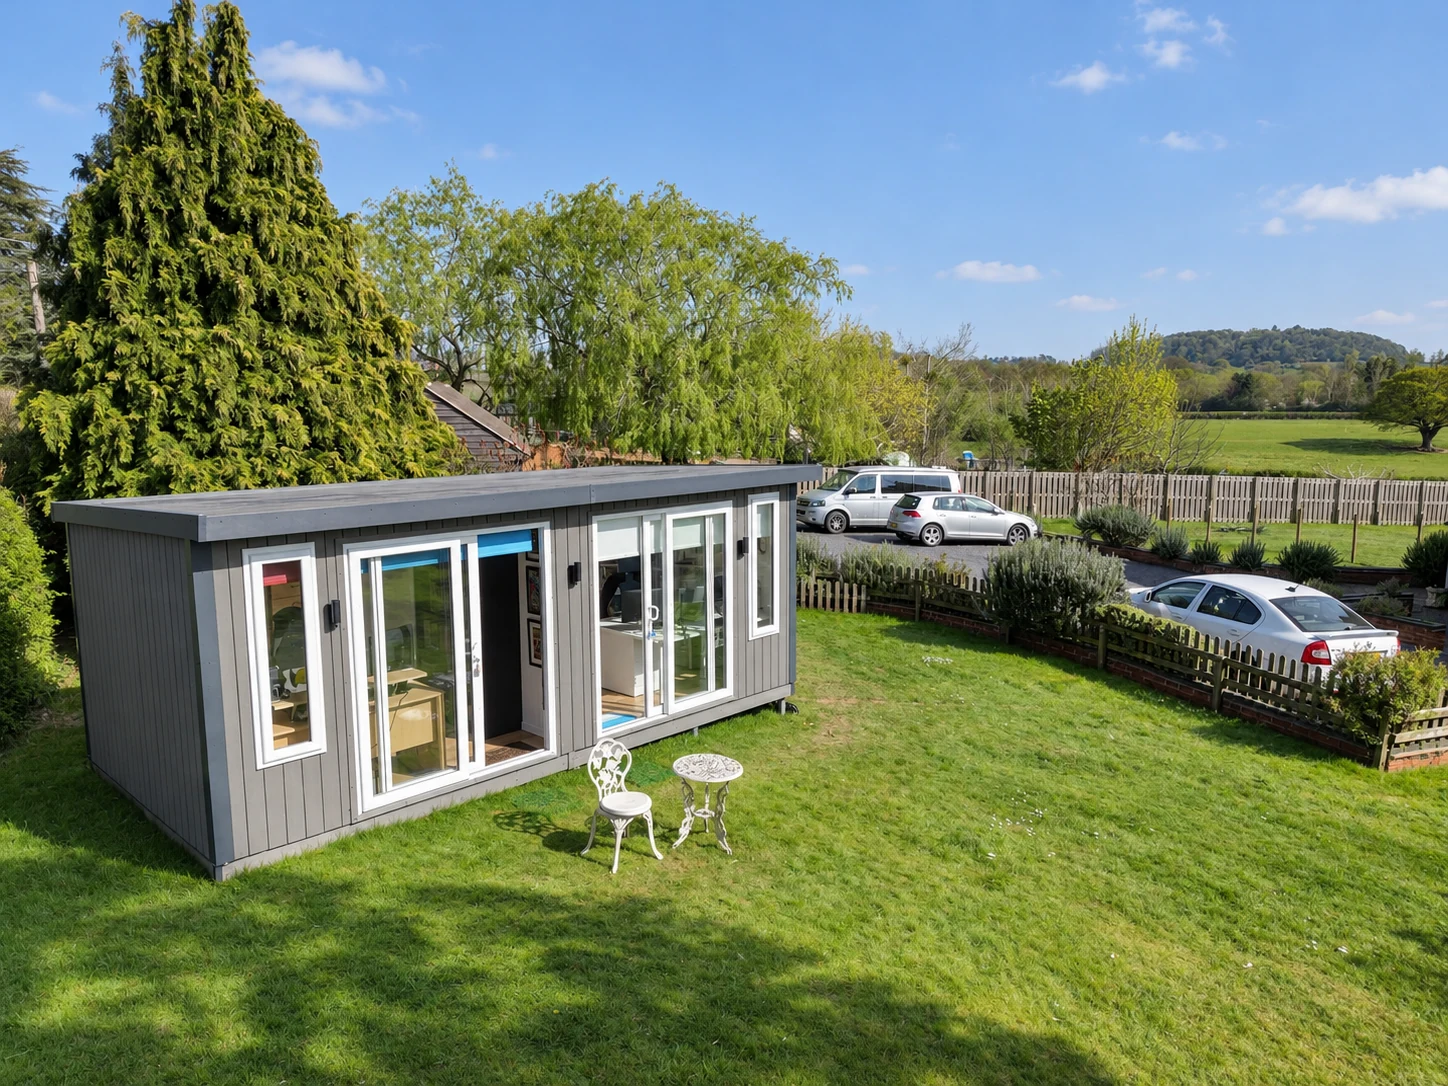
Building a golf simulator garden room in the UK requires a minimum internal height of 2.8m (ideally 3.0m) for safe driver swings. To bypass full planning permission under Permitted Development rules, ensure the building sits over 2m away from property boundaries if its external height exceeds 2.5m.
We all know the frustration of planning a weekend round only for the British weather to wash out the fairways. Even worse, you drive to the local driving range after work and find every single hitting bay packed with long queues.
Building a custom golf simulator garden room changes everything, giving you a private space to dial in your yardages whenever you want. We have spent years helping homeowners move their golfing closer to home, but we know that designing a proper outbuilding can feel incredibly overwhelming at first.
In this guide, we are breaking down the exact measurements, structural choices, and UK planning rules so you can build your dream golf simulator garden room without the stress.
1. How much space do you need for a garden room golf simulator?
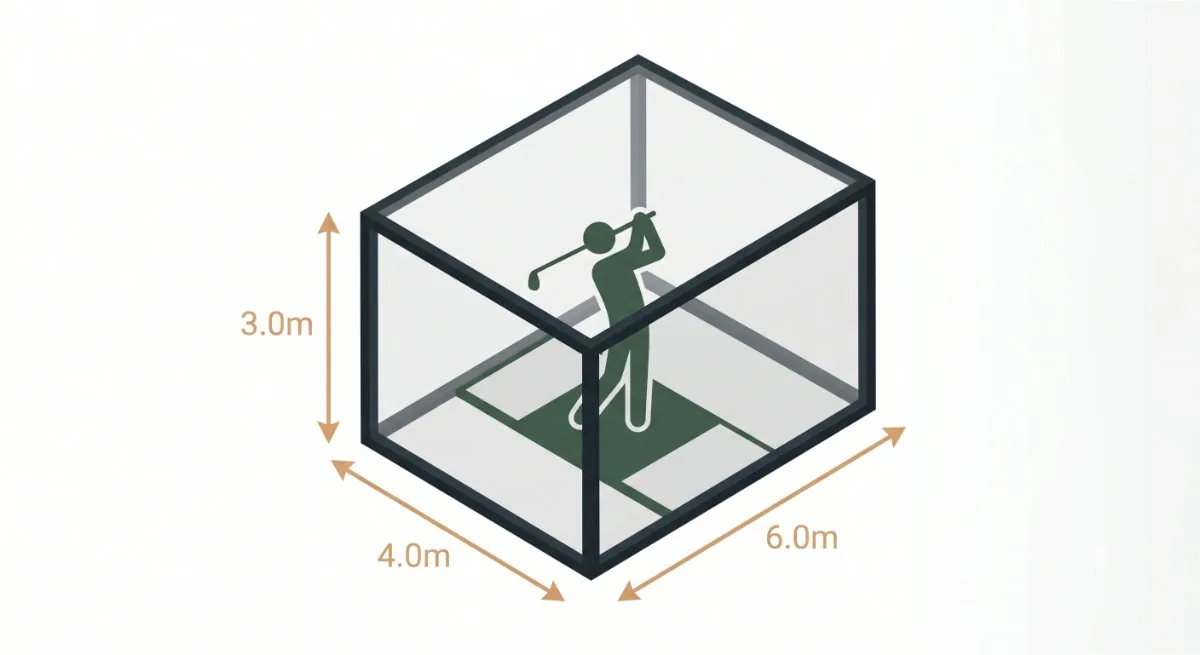
Before you pick out your timber finishes or choose your simulation software, you must accurately measure your garden space. Getting the physical dimensions right decides whether you can use your new room safely or if you will end up restricting your natural swing.
Height, width, and depth: the golden numbers for a safe swing
You must evaluate three measurements when designing your layout. Ceiling height is essential: clipping the roof with a driver ruins the experience entirely.
While a standard garden outbuilding typically features an internal height of 2.1 metres, a golf room needs more vertical clearance. You need an absolute minimum internal height of 2.8 metres, though 3.0 metres provides the ideal clearance for tall players using longer clubs.
Your room width needs to measure at least 3.5 metres, so you do not feel claustrophobic during your follow-through. For total depth, we recommend aiming for a minimum of 4.5 metres to allow comfortable ball flight.
- Minimum Internal Height: 2.8 metres (3.0 metres recommended for full driver swings)
- Minimum Internal Width: 3.5 metres (4.0 metres allows you to centre your hitting mat perfectly)
- Minimum Internal Depth: 4.5 metres (6.0 metres required if you choose radar-based tracking tech)
The buffer zone: protecting your walls and screen
You cannot hang your impact screen directly against the rear timber wall of your building. A golf ball travelling at high speed causes the screen to flex upon impact.
Position your impact screen with a 30cm buffer zone of empty space behind it. This gap stops the ball from hitting the solid wall frame and prevents dangerous, high-velocity rebounds.
You also need to account for the space behind your stance. Leave at least 1.5 metres of clear space behind the hitting mat to accommodate your club recoil and protect any rear seating areas.
2. Planning permission for your garden golf simulator
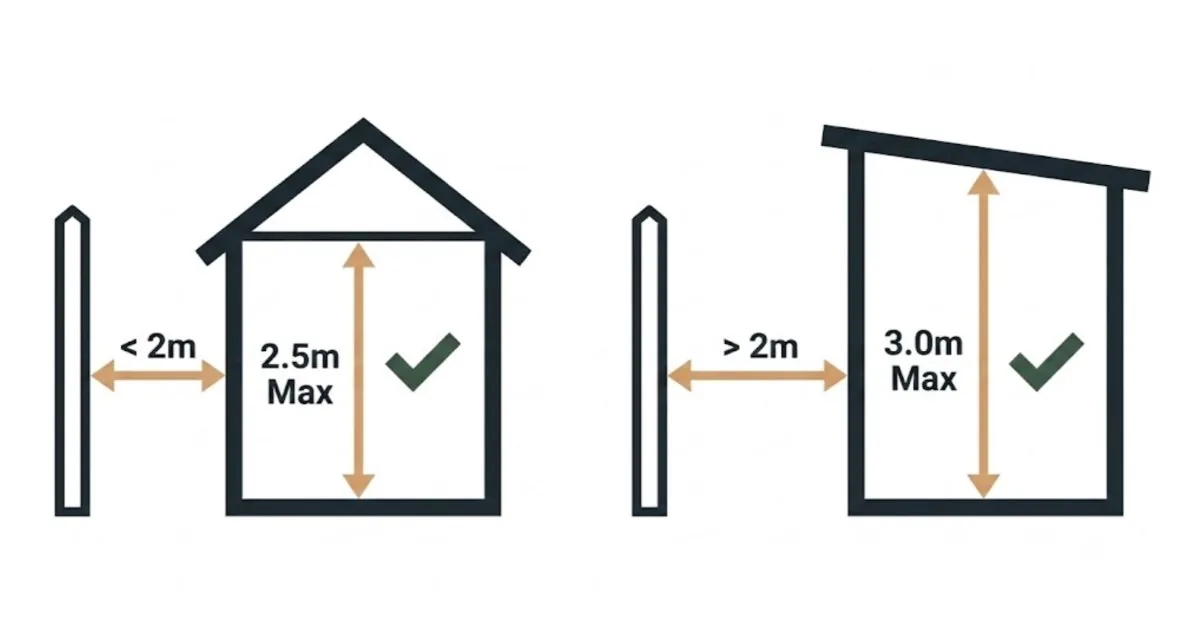
Nobody wants to deal with council paperwork, and we all dread the thought of getting stuck in local planning red tape.
Fortunately, you can usually install a golf simulator garden room under Permitted Development rules without submitting a full planning application. The catch comes down to your physical clearance because a full swing requires a taller roof than the rules normally allow close to a property boundary line.
The 2.5m height rule: staying within permitted development
The UK planning system sets strict outbuilding limits to safeguard your neighbours’ privacy and daylight. If your new build sits within 2 metres of any boundary fence line, the total external height cannot exceed 2.5 metres.
This creates a bit of a hurdle. A reliable garden golf simulator requires at least 2.8 metres of interior space. Add your heavy floor timbers, roof beams, and insulation layers, and your building naturally climbs to around 3.2 metres tall.
Warning: Building a structure over 2.5 metres high right against your boundary line without planning permission breaks the law. Your local council can issue a retroactive enforcement notice forcing you to alter or pull down the structure entirely. Always check with your local planning authority.
The secret fix: sunken foundations and boundary offsetting
We use two clever, practical methods to give you that vital overhead space while keeping your project fully legal.
First, you can position your studio more than 2 metres away from your boundary lines. Shifting the building back opens up a higher legal allowance, meaning we can build a pitched roof up to 3.05 metres tall without an application.
Second, if your garden layout forces you closer to the fence line, we can build a sunken foundation base. Our team carefully excavates the ground by 40cm to 60cm before we set the base frame. Dropping the floor level lowers your external roof height relative to your neighbours’ view while keeping a wide-open internal clearance for your driver swings.
3. Solid foundations: why this is more than just a golf simulator shed
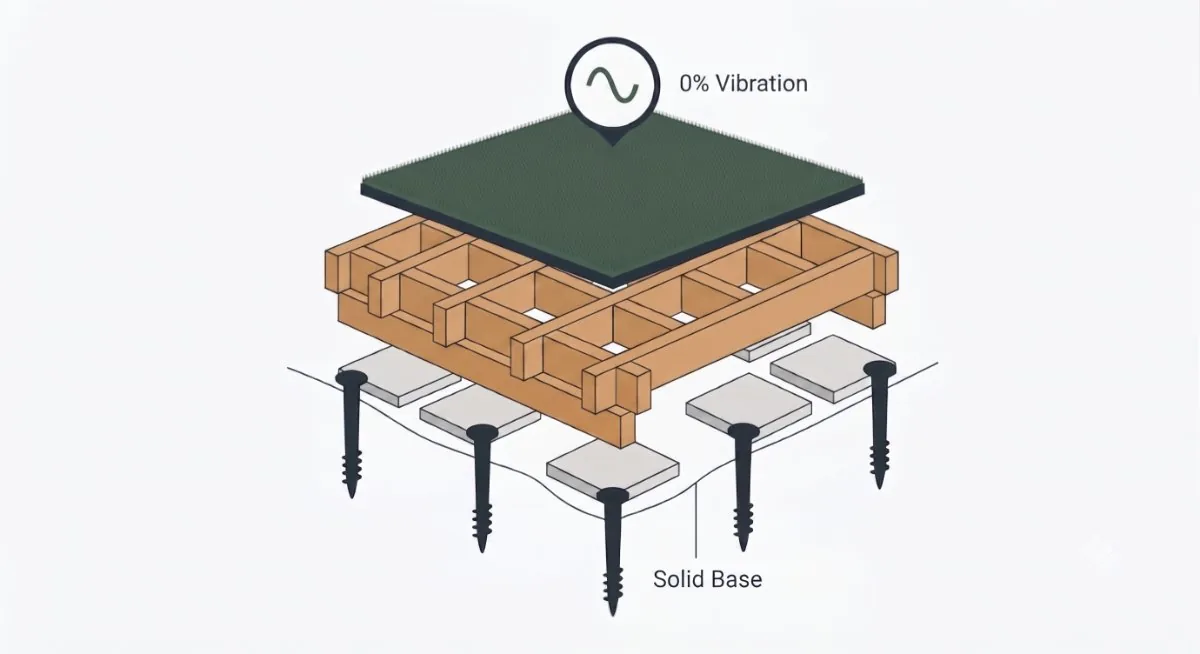
We all hate dealing with messy groundwork, but skimping on your foundation will ruin a luxury simulator room. You are building a high-end sports environment, not a basic storage shed. The structural base needs to handle thousands of high-impact ball strikes alongside the considerable weight of our premium timber frames.
Concrete slabs vs. ground screws: choosing the right base
We recommend two proven options for anchoring your structure safely. A poured concrete slab offers a traditional, ultra-heavy footing that spreads structural weight completely evenly across your plot.
Ground screws provide a faster, modern alternative that our team drills directly into the soil. They skip the messy excavation process entirely and require zero drying time, meaning we can begin standing your walls on day one.
Your choice depends directly on your garden topology. If you have a sloping lawn, ground screws let us adjust individual heights to level your garden room golf simulator perfectly without building massive retaining walls.
At Noah, we offer a full turnkey service, so you don’t need to worry about the foundations: we’ll handle it all for you.
Vibration control: keeping your launch monitor calibrated
There is nothing worse than hitting a perfect shot only for your tracking software to freeze or misread your data. Advanced tracking units use high-speed optical lenses or sensitive radar waves to analyse subtle spin rates. If your floorboards flex even two millimetres when you shift your weight during a downswing, your launch monitor will lose its calibration.
We remove this frustrating issue by building our floors with extra-thick, engineered timber joists laid on a highly compressed grid. This dense structural framing absorbs the impact of your swing, keeping your electronics perfectly steady and your data accurate.
4. Wiring your outdoor golf simulator room
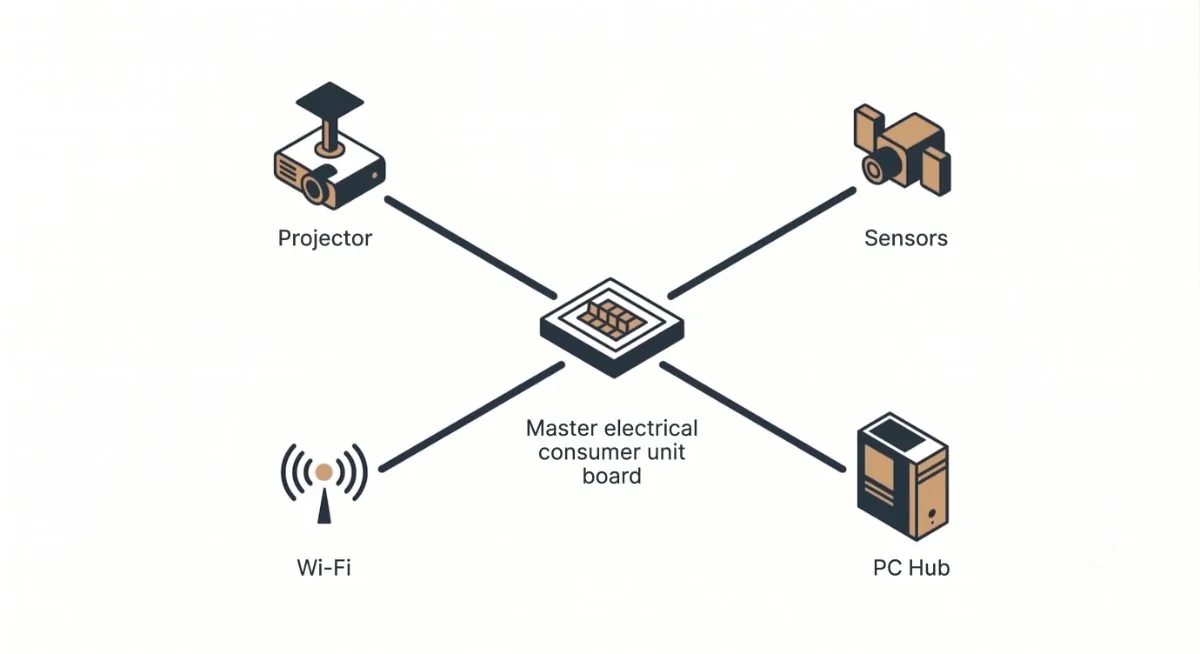
You must map out your electrical layout before our installation team fits the internal wall panels. Planning your cable routes early hides dangerous power cords behind the cladding and keeps your swing path completely clear.
Electrical supply connection: Connection of the garden room to the main property electrical supply is not included unless expressly stated within the quotation. This work can be quoted separately if required, subject to a site survey and the requirements of our electrical contractor.
Cameras vs. radar
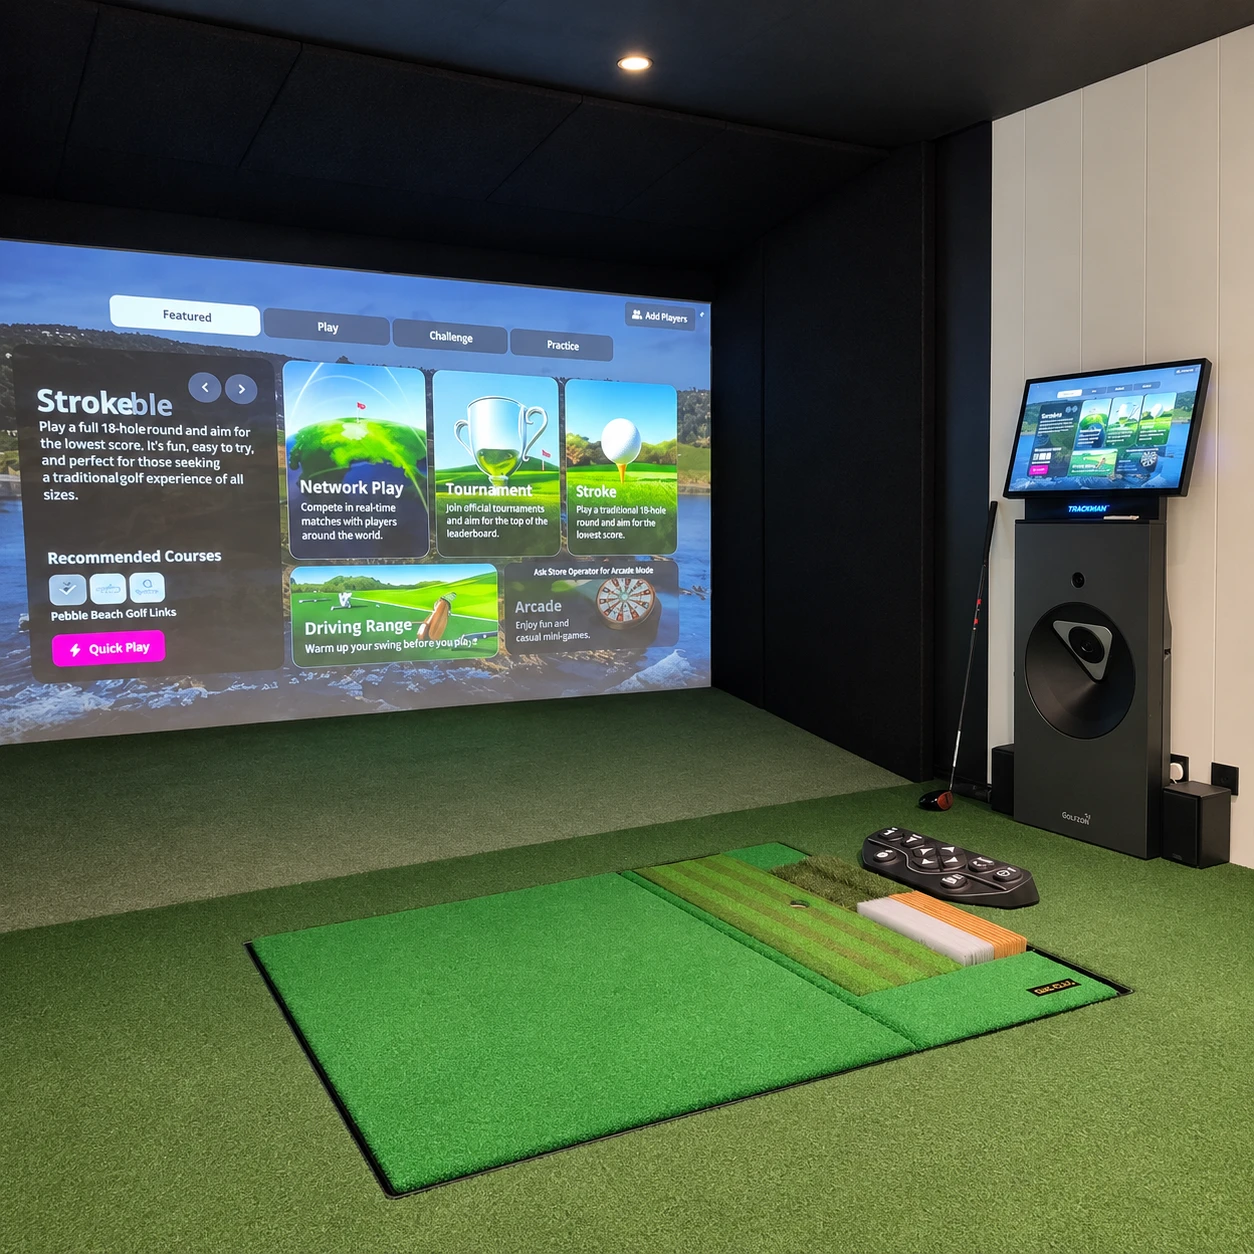
The tracking technology you choose will determine the exact layout of your internal space. Camera-based systems sit directly next to your hitting mat and measure the ball at impact, saving you a lot of floor space.
Radar-based systems must sit several metres behind your stance to track the ball’s full flight path. If you choose a radar monitor for your outdoor golf simulator, you must add extra depth to your room blueprint so the sensors can read your data accurately.
Projector drops, sockets, and lighting setup
High-end tracking devices need a controlled environment to prevent frustrating data misreads. Overhead projectors require secure ceiling drop-points, and camera sensors need shadow-free lighting to read ball spin.
Finalising your golf simulator room ideas before the manufacturing phase ensures we place every power point exactly where you need it. Installing dimmer switches allows you to lower the ambient light, which improves how clear your projector screen looks.
5. Technology and indoor electrical loop wiring ideas
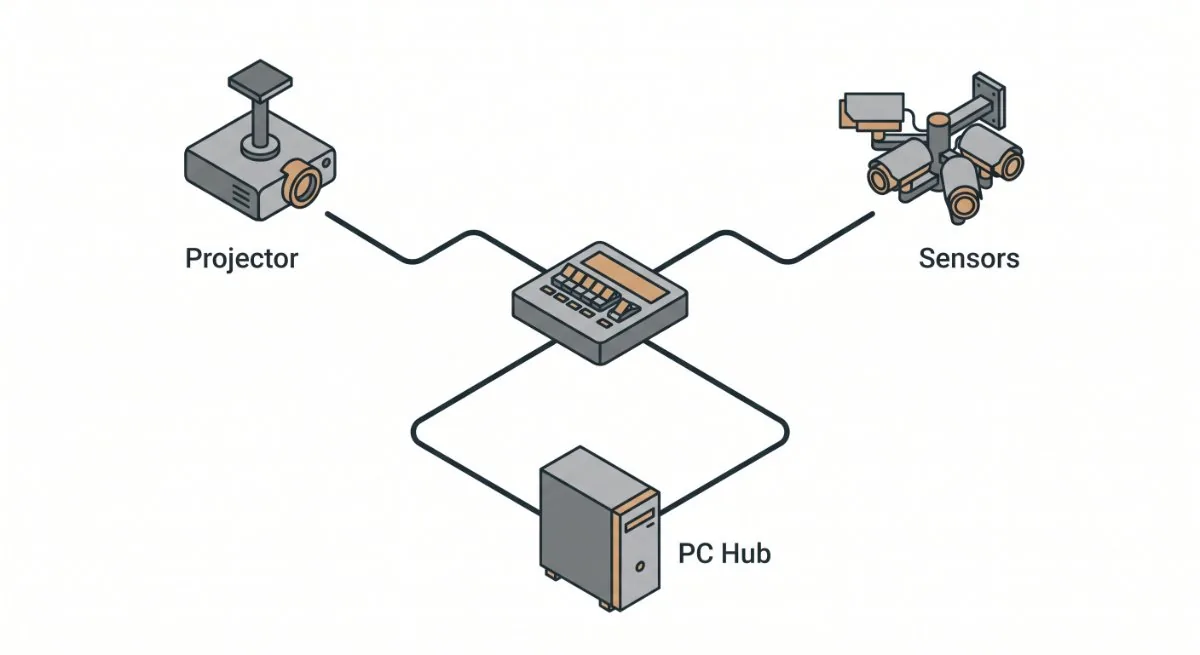
You must plan your hardware selection and electrical layout together before our team installs the internal cladding. Running your cables inside the wall cavities prevents trip hazards and keeps your swing area completely clear.
Photometric vs. radar tracking
Camera-based photometric systems sit to the side of your hitting mat and focus entirely on the ball at impact. These units require bright ambient lighting to capture accurate high-speed images of the ball spin.
Radar-based tracking units sit directly behind your stance and monitor the ball across its flight path. If you choose a radar launch monitor, you must increase your internal room depth so the sensors have enough space to read your data.
Sockets, ceiling projector drops, and network backhauls
High-performance computers, overhead projectors, and screen tracking systems place a heavy demand on your electrical loop. Installing a consumer unit inside your garden room keeps your power supply safe and stable.
You need to install specific drop-points in your ceiling to support your overhead projector mount. Running a hardwired Cat6 internet cable from your main house router ensures you get a lag-free connection during online matches.
- Ceiling projector point: A reinforced ceiling mount featuring a dedicated power socket and a hidden HDMI conduit pipe running to your computer bay.
- Tracking unit light rails: Directional LED spotlights positioned behind your hitting area to illuminate the ball without creating screen shadows.
- Main power hub: Four double sockets placed near your main computer setup to power your PC, screen framing systems, and software and hardware.
- Hardwired internet feed: A dedicated Cat6 data cable running from your main home router to guarantee zero lag during online multiplayer matches.
6. Budgeting your build: total golf simulator room cost guide

Here is a breakdown of what you can expect to pay when you invest in a Noah golf simulator garden room and your style options.
Noah’s timber, cedar, and composite models
Your garden room shell guarantees year-round thermal protection. We offer three material options to match your budget and garden aesthetic.
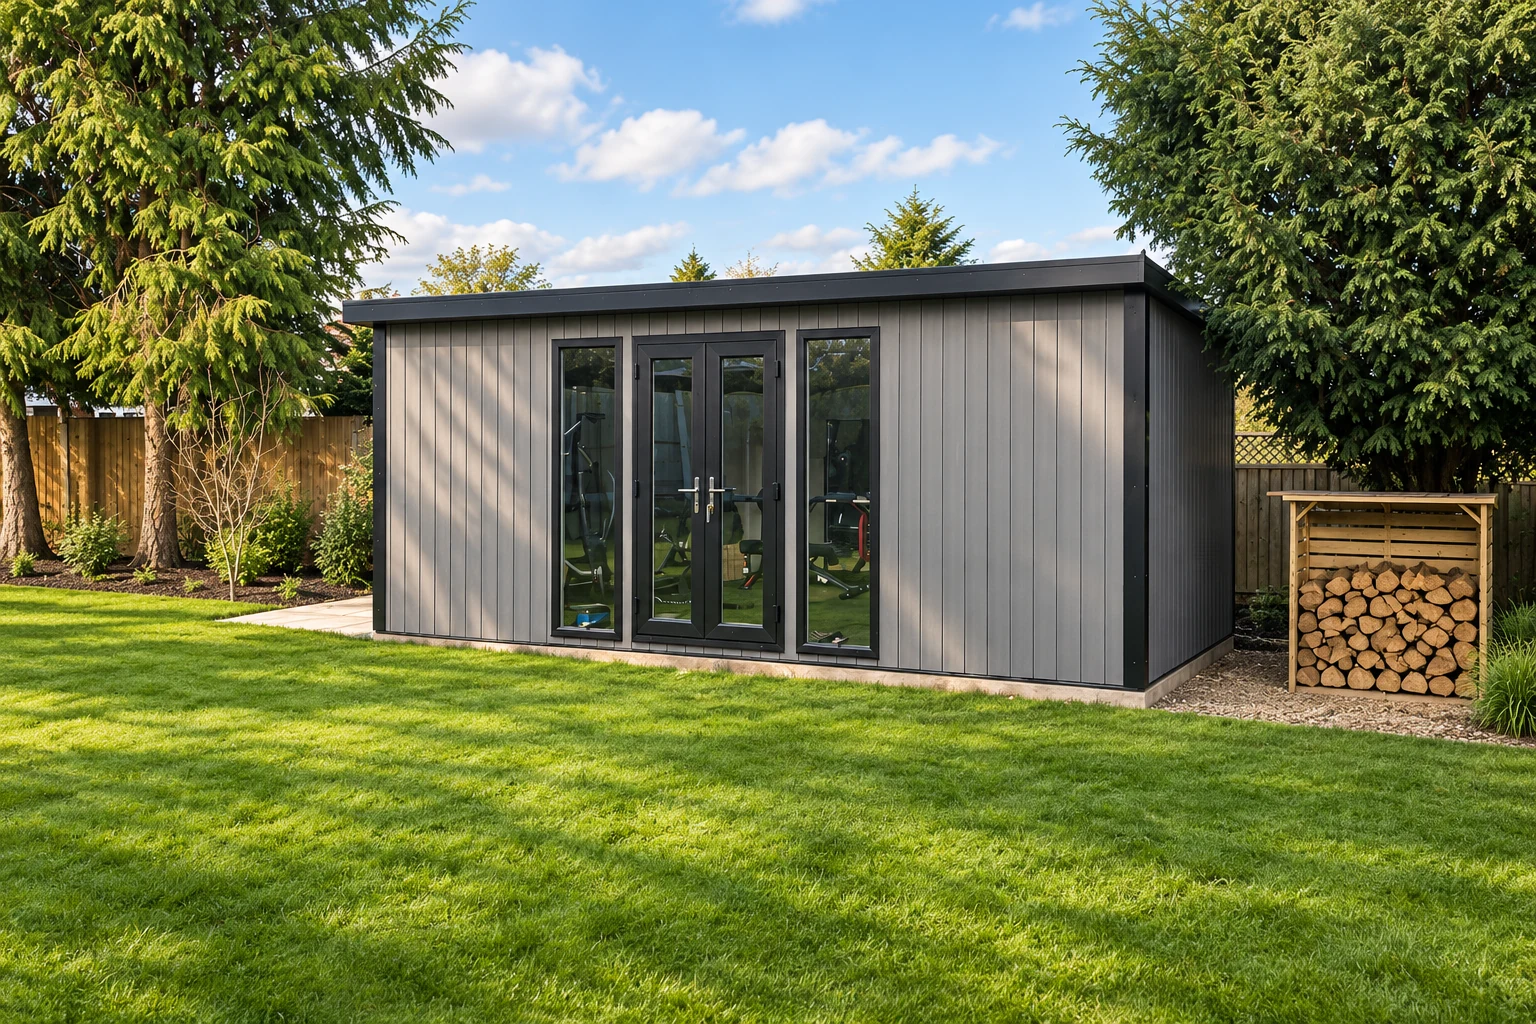
Golf simulator rooms in our Garden Rooms range, which starts from £9,321 for an 8 × 6ft building with its cheapest door, provide a practical entry point for your garden studio, with traditional timber cladding as an option. Upgrading to cedar cladding adds natural rot resistance and a striking, classic finish to your garden.
For homeowners seeking maximum durability with minimal maintenance, our Signature range starts at £12,368. This premium option can use advanced composite cladding panels that require no painting or staining.
From hitting bays to luxury golf simulator man caves
The internal electronics configuration accounts for the remaining portion of your total project spend. You can scale this hardware layout from a basic practice frame to a fully immersive entertainment lounge.
An entry-level package usually pairs a portable launch monitor with a heavy-duty net and a tablet screen. This simple layout keeps your initial costs low while providing accurate swing speeds and ball data.
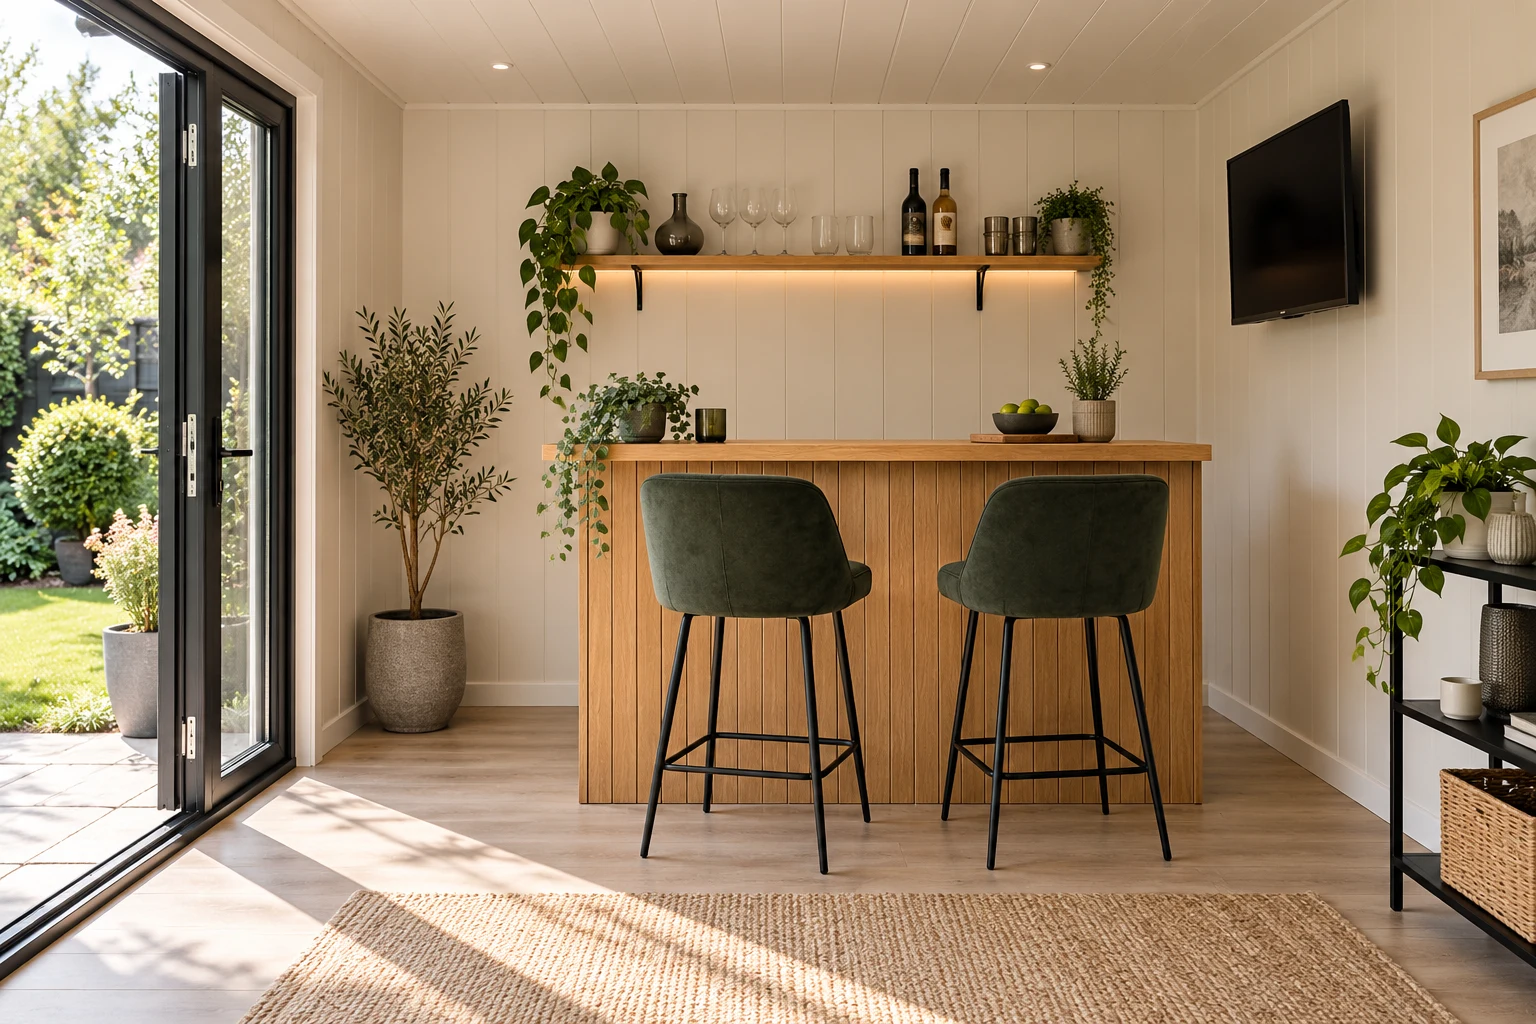
Transforming your building into a luxury golf simulator man cave requires an overhead dual-camera tracking system, a commercial impact screen, and a high-spec gaming PC. Adding custom leather seating, ambient bar areas, and surround sound creates a premium multi-sport entertainment hub for your family.
Noah Garden room golf simulator setup costs
| Model | Hitting & Tracking Tech | Estimated Total Investment |
|---|---|---|
| Garden Room in timber | Portable launch monitor, heavy net, tablet display | Entry level |
| Garden Room in cedar | Fixed launch monitor, impact enclosure, standard projector | Mid-range |
| Signature in composite | Overhead dual-camera array, premium screen, custom PC bay | Premium |
Final steps to your dream golf simulator garden room
Getting your ceiling height right, managing your fence line boundaries, and laying a completely rigid subfloor are the absolute non-negotiables of a successful build. We know how easy it is to feel overwhelmed by all these specs when you just want to get out there and hit some balls.
That is why our team manages the entire process in-house, designing, manufacturing, and installing your garden building so you do not have to worry about a single mistake. We will handle the heavy lifting while you pick out your favourite tracking software and practice routines.
Are you ready to step out your back door and see your personal driving range standing on your lawn? Get in touch with our design team today, or bring your ideas to life with our 3D design tool.
Sources: Planning Portal: outbuildings and planning permission; Planning Portal: building regulations for outbuildings.