
In this article
The short version
- Your chosen hobby decides the layout; plan at least one metre of clear floor space around stationary tools.
- A concrete base offers the most stability for heavy machinery, while a grid system works well for lighter crafts.
- Insulation and a breathable membrane help stop the condensation that rusts tools and rots timber.
- Garden Rooms come with internal electrics as standard; connection to your house supply can be quoted separately.
- Light the bench with LED battens in front of and above it, and keep heavy machinery on mobile bases.
A professional garden workshop needs structural loads and temperature control to avoid damp and structural issues. We recommend a concrete or timber grid base to handle heavy machinery, while 19mm cladding stops the walls from bowing under pressure. Add foil insulation to prevent tool rust and keep the height under 2.5m to avoid planning headaches.
We know the feeling of opening your shed door only to find your favourite chisel covered in rust. It usually happens because we settled for a garden building that was never actually meant to be a garden workshop.
A standard thin-walled shed just cannot handle the British damp or the weight of heavy machinery. You need a workspace that stays dry in mid-winter and remains stable when you are pushing your equipment to the limit.
This guide walks you through the technical realities of creating a workspace that actually works for your craft. We will look at the foundations, the thermal lining, and the layout logic required to make sure your investment stands up to decades of hard use.
Practical garden workshop ideas

Your chosen hobby will decide the best layout for your space. You need a floor plan that supports your work and keeps your most-used tools within arm’s reach. Here are some practical garden workshop ideas.
Small shed workshop ideas for crafters
You can achieve high levels of productivity in a smaller space with the right storage. Small shed workshop ideas for crafters usually focus on vertical space. Use pegboards and wall-mounted bins to keep your work surfaces clear of clutter.
If you are a jeweller or electronics enthusiast, you will need a shallow but sturdy workbench. Position your station directly under a window to maximise daylight for more detailed work. Fold-away benches provide an excellent way to create a multi-use area without making the room feel cramped.
Large garden shed workshops for woodwork
Carpentry and furniture restoration require more swing room for handling long timber boards. Large garden shed workshops provide the space you need to operate machinery safely.
You must plan for at least one metre of clear floor space around stationary tools like table saws or planers. This prevents accidents and allows for better dust extraction.
For a premium finish that naturally resists decay and provides a professional aesthetic, consider a high-specification cedar workshop in our Garden Buildings range. Choosing a model with double doors makes moving large materials and finished projects in and out of the building much simpler.
| Activity | Recommended Size | Key Feature Needed |
|---|---|---|
| Jewellery & small crafts | 8ft x 6ft | High-level natural light |
| Bike & tech repair | 10ft x 8ft | Double doors for easy access |
| Carpentry & woodwork | 14ft x 10ft | Heavy-duty 19mm flooring |
| Art & design studio | 12ft x 8ft | Insulated glass for full lighting |
Groundwork for garden workshop buildings
You must start with a flat, stable surface to protect your investment. Skipping the preparation leads to long-term structural issues that affect how your windows and doors function. A solid foundation ensures the timber frame remains square and true for the life of the building. At Noah, we offer a full turnkey service, so we can handle the base preparations for you.
Concrete slabs
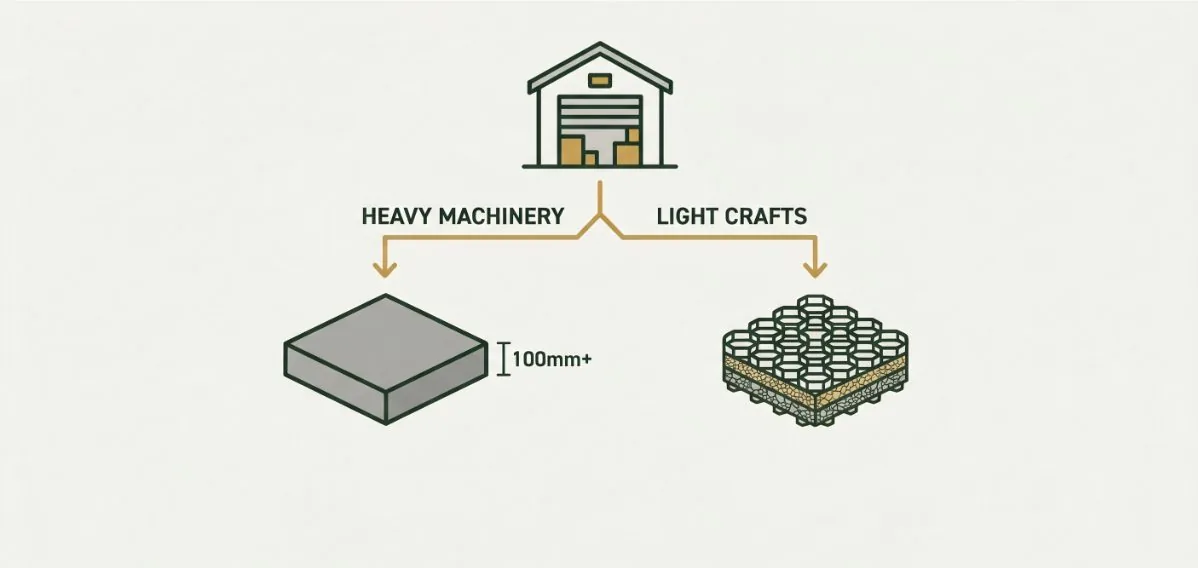
We consider a solid concrete slab the gold standard for any professional workspace. By pouring a solid mass of stone and cement, you create a surface that does not shift under the vibration of heavy machinery or the weight of a 19mm timber build. We use a thickness of at least 100mm to ensure the floor remains rigid when you are operating industrial-level tools.
Grid bases
A plastic grid base provides a faster and cost-effective alternative for hobbyists. These interlocking cells create a permeable surface that allows water to drain away from your timber, which prevents your floor joists from rotting. We install these grids over a sub-base to stop the building from sinking into the soil over time.
While the grid system works well for lighter crafts, a concrete base offers the most stability for heavier machinery.
Level foundations
Having a level foundation is also essential, as it allows the tongue-and-groove boards to sit snugly together. When the building sits level, the weight of the roof and walls is distributed evenly across the floor. Here’s how to ensure your foundations are level.
Testing for level foundations
- Place a spirit level across the base in multiple directions to identify high spots.
- Check every corner to ensure the entire perimeter is on a single plane.
- Try the penny test by standing a coin on its edge on your base. If the slope is steep enough to make the coin roll away, you need to adjust your levels.
- Inspect for gaps between the spirit level and the surface to avoid dips in the floor.
Why you need an insulated garden workshop
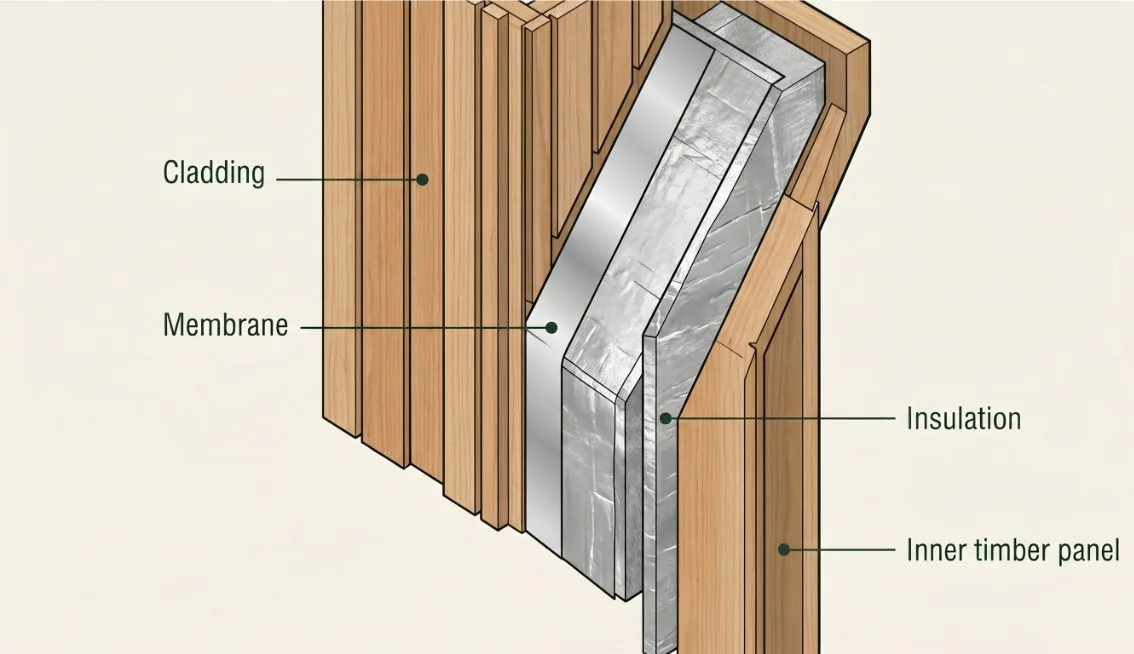
Condensation will ruin your tool collection. When warm air meets a cold surface, it releases moisture. You need an insulated garden workshop to prevent any moisture buildup.
How Noah insulation stops tool rust
Foil-backed insulation creates a thermal barrier that blocks moisture from forming on metal surfaces. You protect your saws and power tools from the rust that destroys precision edges. This thermal stability allows you to work throughout the year without fighting the damp.
A consistent internal temperature stops the cycle of heating and cooling that draws moisture into your workshop. You save money on tool maintenance and replacement. You also create a stable indoor temperature for projects that require a steady climate, such as wood glueing or painting.
Breathable membranes in a garden workshop shed
Timber needs to manage moisture to stay healthy. We install a breathable membrane between the external cladding and the frame. This shield allows internal water vapour to escape while stopping external rain from soaking the interior timber.
Adding this layer to your garden workshop shed prevents moisture from staying against the wooden studs. This step stops the timber from rotting, so your workspace remains dry and free from mould growth over several decades.
Why floor and roof insulation are essential
Heat loss occurs in the places you cannot see. Most heat escapes through the ceiling or the floor. We install dense insulation boards in these critical zones to keep the temperature stable.
Insulating the floor and roof prevents cold feet and reduces the strain on your heater. This level of detail separates a basic outdoor room from a high-quality office that you can use comfortably in mid-winter.
Setting up your new garden room workshop
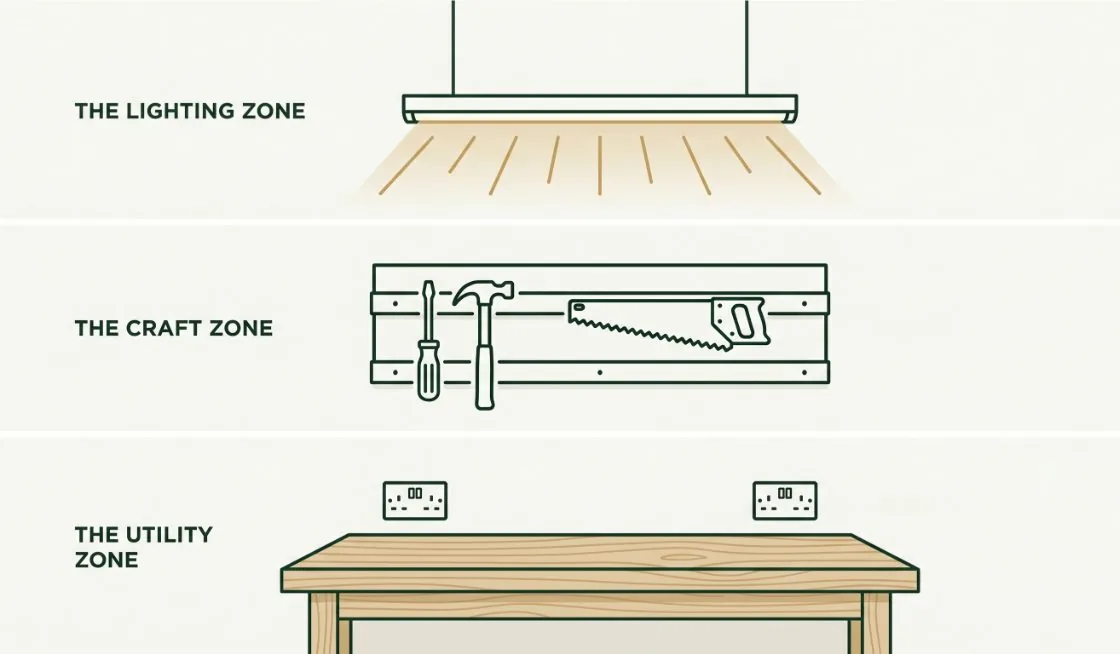
You need a garden workshop setup that allows you to focus on your craft without tripping over cables or squinting in the dark. Here’s how to start planning your interior.
Choosing a garden workshop with electrics
You shouldn’t have to spend your first week in a new workshop chasing electricians for quotes. Because Noah offers full internal electrics as standard with our Garden Rooms, your workspace arrives pre-wired and ready for your equipment.
Electrical supply connection: Connection of the garden room to the main property electrical supply is not included unless expressly stated within the quotation. This work can be quoted separately if required, subject to a site survey and the requirements of our electrical contractor.
Our professional installation includes a dedicated consumer unit inside the building, which can be linked to your home via a Steel Wire Armoured (SWA) cable. This is the safest way to deliver high-voltage power through a garden, providing a dedicated circuit that prevents workshop power surges from tripping the lights in your kitchen.
Avoiding shadows with smart LED placement
Poor light causes mistakes and increases injury risks. You should install high-output LED battens to provide a bright, even light across the entire room. Cool white LEDs offer the best colour accuracy for painting or detailed work.
Avoid placing a single central light, as this creates shadows when you lean over your bench. Position your main light sources slightly in front of and above your workspace to keep your hands visible.
Creative workshop shed ideas for tool storage
A productive workshop follows a workflow. You should group your tools by task to minimise movement across the room. Pegboards provide flexible storage that grows as you add new equipment to your collection.
Keep your heaviest machinery on mobile bases. You can roll a table saw into the centre of the room for large cuts and push it back against the wall to reclaim floor space. This approach to your workshop makes even a small building feel like a professional space.
Ready to create? Design the ideal workspace for your craft
A professional workshop should work as hard as you do. While a Noah Garden Room is built to look the part, its real value lies in the heavy-duty materials we use.
We engineer our structures with 19mm cladding and 75mm framing as standard because we know you are going to load the walls with heavy tool racks and push the floor to its limit.
If you are ready to trade a cramped corner of the house for a dedicated space built to withstand the British weather, we are here to make it happen. You don’t need to be an expert to get the load-bearing specs right: that’s our job.
Request a callback from our team today. Let’s work together to spec out a building that fits your craft perfectly.
Sources: Planning Portal: outbuildings; GOV.UK: Approved Document P, electrical safety in dwellings; HSE: wood dust.